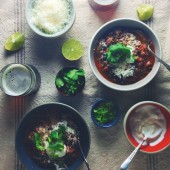
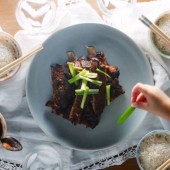
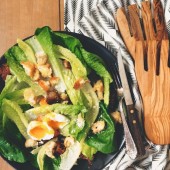
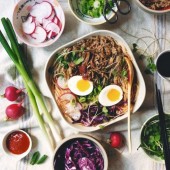
Here we are. The last CSA post of the season. I don’t know whether to click my heels in the air or shed a tear. I’m torn….
These posts are a beast to put together – many of them tally 3,000 words in length, which to give you some perspective, is like writing an AP English final every week (albeit without the stress and pre-reading).
But it’s fun. I love taking you on a journey through food: how we tackle mealtime based on our CSA deliveries, and how we use leftovers from one meal to create the next. It keeps me honest – never again will I question exactly what went into that strawberries and cream cake that I served on Emma’s birthday, or wonder how I made those waffled grilled cheeses.
I keep thinking about next week’s post, and the post after that – will I feel empty writing about just….one dish?
Perhaps. And perhaps not. Maybe having some free time will motivate me to clean out the kids’ long stockpiled art collection. Shop for some desperately-needed non-2007-era clothes. Massage? Manicure! This is actually starting to sound good….
Today I’ll leave you with the set of recipes that I made from my final Bialas Farms box: Week 18. Here’s what we received in our box this week:
- Baby Bakers (potatoes)
- Leeks
- Green Cabbage
- Delicata Squash
- Shallots
- Lettuce
- Sweet Carrots
- Bunched Beets
- Sugar Pumpkin
- Celery
- Bok Choy
It’s a big set of recipes. Something about this being my last box made me nostalgic about my deliveries before the week was over. If last week I struggled to put interesting meals on the table, this week I was chock full of ideas. It also helped that I received my monthly box from Hatchery, whose products always seem to get the juices flowing.
I’ll admit that the first meal that I made doesn’t fall squarely into the “interesting” category. A split roast chicken, carrots and parsnips cooked in honey, butter and herbs (along with some of the chicken juices).
Not creative and unique, but certainly delicious…And made for a beautiful Saturday night dinner at the lake, paired with a butternut squash casserole and a fresh green salad with a previous week’s stash of leftover romaine.
I found the squash casserole on Food & Wine magazine’s site and followed it to the letter. Not only was I able to use my CSA butternut squash, but I also used some of the leeks from last week’s box, as well as thyme from my kitchen garden. If you’re planning Thanksgiving sides, I highly recommend this bad boy.
With a little leftover chicken, and some homemade stock from the bones, I made a Sunday night (gluten free) chicken noodle soup. I had a few old zucchinis from a few weeks ago, which looked like they were nearly ready for the garbage bin—but I was able to salvage this sorry lot by peeling off some of the softening green skin, and spiralizing them into noodles.
My kids are so-so with spiralized zucchini noodles on their own, but I learned this week that if you add them to soup, their whole attitude changes. Sam even declared this chicken and vegetable noodle soup his new favorite. In fact, he made me promise me that I would still make him this “when he’s an adult”. Deal.
To make the chicken soup with zucchini noodles
First make the chicken stock by taking the remaining bones from the half chicken and placing them along in a slow cooker with a few types of chopped vegetables (I used leek greens, carrots, and celery) along with some thyme and black peppercorns. Cover with water and cook on low overnight, and then strain the next day. Save any remaining chicken for your soup, and if you have none left, simply cook a breast the next day and chop/shred it for the soup. Store the stock in the fridge until you’re ready to use it for the soup.
When you’re ready to make the soup, simply prep a bunch of vegetables- I used chopped celery, carrots, red peppers, and zucchini noodles (1 zucchini, peeled, and passed through a spiralizer). Since the carrots, celery and red peppers are quite hard, you can either cook them in the chicken stock in the slow cooker for a few hours when you’re out that day, or if you’re using them at the last minute, put them in a microwave-safe container with a splash of water, and nuke, partially covered, for about 2 minutes. Drain the water. In a Dutch oven, combine your vegetables (including the zucchini noodles) and your stock and bring to a simmer. Add salt to taste, and some chopped fresh parsley. In a separate bowl, whisk an egg, and then slowly add a ladleful of hot stock to the bowl, whisking constantly. Take the pot of soup off the heat, and then add the stock/egg mixture to the pot, stirring constantly. On low heat, warm the soup gently for a minute or two, making sure that the soup doesn’t boil and scramble the eggs. Serve with a grinding of fresh black pepper.
Note: If you have leftovers, this soup may separate in the fridge. If that happens, just give the jar a good shake before heating it back up.
If you were to guess what my favorite vegetable has been, you would likely guess incorrectly. The vegetable that I loved most of all, strangely enough, was this: German white garlic.
There is a huge difference between the garlic that I find at the grocery store, and the plump, sturdy cloves that I received most weeks as part of my CSA. The German white garlic heads come with only 4-5 cloves – not multitudes of tiny cloves that make you peel and curse, peel and curse. I hate that garlic. It does the job, but oy.
So not only did I receive garlic most weeks with my CSA, but I also bought extra to stow away for rainy days and stewing adventures.
This is not stew:
But it’s one of the tastiest uses for garlic.
I first came across Bagna Cauda while reading Alice Waters’ cookbook Chez Panisse Cookbook. Bagna Cauda is simply a warm bath of anchovies, garlic, olive oil and butter, which you use as a dip for vegetables.
While the Chez Panisse method calls for warming your ingredients together on the stove, I decided to simply blitz the ingredients together and use it, somewhat more sparingly, as a thick, almost spicy sauce.
It was wonderful as a bed for whole roasted heads of romanesco. Warning: if you don’t like strong flavors, cook the bagna cauda down and drizzle it on top of the romanesco instead. But I liked it the way it was. And I made sure to eat 10 mints before I left the house for school pickup that day. Do not forget this crucial tip.
To make the romanesco with bagna cauda:
Douse the romanesco with olive oil and a touch of salt and pepper and roast on high heat (425 degrees) for 20 minutes before turning down the temp to 300 and continuing to roast for another hour. Romanesco cooked whole like this takes a long time to cook, and even then will be slightly crunchy in the center, but the outer stalk will be tender and blackened in parts.
While the romanesco is roasting, prepare the bagna cauda by following the recipe on Epicurious. This will make quite a bit of dip, so be prepared for leftovers. (Some of the recipes below will actually call for it, so just store in the fridge and use as needed – it should keep for about a week.)
Spread some of the dip on a plate and top with the roasted Romanesco – this can be done on individual plates or in a larger dish for groups.
Here’s how I continued to use the bagna caudal throughout the week. First up: cabbage rolls. Feel free to omit the bagna caudal addition, but I find that it gave this dish a nice umami bomb.
These cabbage rolls were unique because I used what I had on hand to make some Thanksgiving-style rolls: ground turkey, carrots, parsnips, cranberries, quinoa, parsley and thyme. You wouldn’t think that those flavors would work with a tomato-based sauce (after all, how often do you see tomatoes on your Thanksgiving table?)…however – it worked. Rodney ate seconds, then thirds, which as you may know by now, is the ultimate barometer for success in this house.
To make the Thanksgiving-inspired cabbage rolls:
Make a quick tomato sauce on the stove by sautéing a chopped onion in some olive oil for a few minutes until translucent. If you’d like at this point you can also add a heaping tablespoon of the bagna cauda (which solidifies when it’s in the fridge), although the sauce will still taste great without it. Melt it down into the onions and then add 2 tablespoons of tomato paste and a 28 oz can of diced tomatoes. Cook for 1 minute more. Add a half tablespoon of oregano, season to taste with salt and pepper, and then bring the sauce to a boil, turn it down to low, and simmer for 30 minutes.
While the sauce is simmering, prep the filling. Sautee a small diced onion and 1 lb of ground turkey in olive oil with salt and pepper until the onion is translucent and the turkey is no longer pink. Add a pinch of dried thyme and sautee another minute more. Scrape into a large bowl and stir in the following ingredients: 2 cups cooked quinoa, a handful of chopped parsley, 1/3 cup of dried cranberries, and 1 cup of cooked honey-roasted carrots and parsnips. These should be leftovers if you made the chicken earlier in the week – but feel free to use whatever you have on hand (e.g. leftover squash, sweet potato, etc.) Taste for seasoning, adding a little more salt and pepper if necessary.
When you’re ready to assemble the cabbage rolls, preheat your oven to 350 degrees. Spoon the tomato sauce into a baking dish – mine was fairly small and only fit 4 cabbage rolls, but the stuffing ingredients and tomato sauce included in the recipe above should cover you for 8-10 rolls. If you’re only making 4, store the stuffing and use for something else (e.g. freeze for later use, or stuff some peppers, zucchini boats, etc another night.)
Remove the large leaves from a green cabbage (remove as many as you’re planning to use) and carefully cut out the tough inside core. The majority of the leaf should be intact- just missing the small core at the bottom.
Working one at a time, place about ¼ cup of stuffing (depending on the size of your leaves, it may take less or more filling) at the bottom of each leaf, near the spot where the core was removed. Fold the base of the roll over the stuffing, fold in the sides of the cabbage leaf to keep the stuffing contained in the middle, and then roll over one more time, placing the rolls seam side down in the tomato sauce.
Once the rolls have been placed into position, brush olive oil over the top, season with salt and pepper and bake for about an hour until the tops are golden and the tomato sauce is bubbling. Take care when serving, they get extremely hot!
Do you want more chicken recipes from me? Probably not, especially given that it doesn’t call for vegetables beyond my CSA parsley. But, every one of my chicken dishes is ever-so-slightly different – this one calling for a final whisking of savory yogurt before plating. And it might be a new favorite. In fact, I made it a second time last night for my parents who were visiting for the weekend. Rodney and the kids immediately instated a “no-chicken-legs-for-7-days” rule; I’ll try my best to adhere. But really, crispy skin, savory sauce….how can I live for 7 straight days without this?
To make the chicken with lemon sea salt yogurt sauce:
Rub the chicken with a good garlic pepper rub (I used Greenpoint Trading Co’s roasted garlic pepper rub) and if you’d like, season with a little more salt and pepper. (No one’s ever accused me of taking it easy with the salt).
Heat a large sautee pan over medium high heat and then add a few tablespoons of grapeseed oil. When the oil is close to smoking, add the chicken, skin side down, and sear for a minute or two until golden. Flip, and then sear the other side. Cut a lemon into slices and place them around the chicken. Cut another lemon in half, and use the half to squeeze lemon juice around the chicken. Place in the oven at 300 degrees for about an hour, cooking it low and slow to seal in the juices.
When you’re ready to serve, remove the chicken to a plate, and stir in about 4 ounces of sea-salted yogurt (I used Sohha savory sea salt yogurt, which you can find in the New York area, but if you don’t have it available, you can easily use a full-fat yogurt seasoned with a pinch of sea salt. If you’re using Greek, thin it out with a little milk so that the sauce will be of a thinner consistency). Make sure to scrape the pot really well to get up any of the accumulated chicken juices and bits of char and then stir in a handful of chopped parsley. At this point you can either plate individually, with the sauce under each piece of chicken, or simply lay the chicken on top of the sauce in the pot to serve family-style.
By the way, it makes for the best leftovers (I’ll be eating this exact meal for lunch today). Split a baguette in half, spread the lower (flat) side with some of that endless stash of bagna cauda, top with lettuce and the leftover cold chicken. Serve with a knife and fork open-faced (or close it with the other half if you’d like).
I haven’t dealt with snacky things too much in these CSA posts – namely because I don’t tend to snack. I’m not averse to snacks, but ironically, for the little meals that they’re intended to be, they take time to prepare. Yes, you can snack on a slice of cheese, and while I do that on occasion, I can’t justify showing you that image here. Even if it were relaxing on a wedge of zucchini.
But last week I’d made the baby bakers for dinner the night before. I’d already done all the work of boiling, crushing, and baking the potatoes, so all that was required was to re-crisp them in the oven. I then topped them with slices of salty smoked salmon, a dollop of sea-salted yogurt, and a few fennel fronds for color. This was lunch. A snacky lunch, a salty lunch, but lunch nonetheless.
To make the potato “latkes” with smoked salmon and yogurt
Scrub a few small boiling potatoes and then place them in boiling, salted water for approximately 20 minutes. You’ll know when they’re done when you can pierce them easily with a knife. While the potatoes are boiling, preheat your oven to 350 degrees. Drain the potatoes once cooked, and let cool for a few minutes. Line a sheet pan with parchment paper, and then one at a time, slightly crush the potatoes (I like to use the bottom of a glass for this). Place the crushed potatoes on the sheet pan, and brush with olive oil, and season with a little more salt and pepper. Bake, turning once in between, until the potatoes are golden (this will take about 45 minutes).
To serve, top the potatoes with a small folded slice of smoked salmon, a dollop of sea-salted yogurt, and a few fennel fronds.
Kasha gifted us last week with a container of popcorn, made, presumably from the farm’s uber-sweet corn. I hadn’t used it yet, but perhaps subconsciously I knew I’d be writing about snacks this week…because out came the popcorn pot….the butter…the Sriracha.
I’ll let you envision the rest…
To make the popcorn with Sriracha butter:
Using a large Dutch oven, heat a few tablespoons of vegetable oil on medium-high, and when close to smoking, add ½ cup of popcorn kernels. Place the lid on the Dutch oven, and shake the pot, keeping it in contact with the burner. You should hear the popcorn pop, and continue to shake every so often until the popping reduces in frequency (this will take a few minutes).
Once the popcorn is done, melt a few tablespoons of butter in a small saucepan and when melted, add a tablespoon or two of Sriracha (or to taste). Pour the Sriracha butter over the popcorn and season a little more with salt if necessary.
We’re getting towards the end, I promise. I do feel guilty making you read through these 3,000 words each week, but then rationalize that I’m not holding a gun to your head. For those of you who have gotten this far, thank you….
When you buy fresh from the farm, your produce lasts forever. Maybe I’m stretching – a few weeks at least. Like this spinach, which I’d popped in a bag after our delivery on Week 15? 16? and kept in the crisper. I probably should have just washed, wilted and either fridge-stashed or frozen it, but as would be the case, I just left it. The good news is that minus a few leaves that had started to fall apart, the bunch was nearly perfect. So I cleaned off the good leaves, wilted the whole thing down, and had enough spinach for two meals.
The first of which was this Eggs Florentine, which although it lacks the hollandaise that is traditionally paired with the dish, it was still perfect. Aside from letting me use my spinach, I was able to use the smoked salmon left over from my October Hanukah experiment (aka my random Tuesday potato and smoked salmon latkes).
The second use for the spinach: meatballs. It’s the oldest trick in the book to get your kids to eat their veggies. Fortunately it’s a trick that I seldom use as my kids mostly like their veggies, but the bury-healthy-things-in-their-favorite-food works wonders. And it’s a two-fold win: it helps pack veggies into your kids and helps get the last squeezable drop out of your CSA. These meatballs required about a quarter cup of the leftover spinach, but I was also able to throw the last of the cipollini onions into both the tomato sauce and the meatballs. And guess who made a surprise guest appearance? The bagna cauda! That’s right…If you tell my children that anchovies were in their favorite tagliatelle and meatballs, I’ll…I’ll…I’ll…I’ll figure it out I’ll get back to you. But it will definitely be bad news.
To make the tagliatelle with turkey meatballs:
To make the tomato sauce, sautee a small onion until golden, and then add the slow cooker along with a 28-ounce can of diced tomatoes, and a 14-oz can of plain tomato sauce. Add some dried oregano and (optional) some chopped herbs – e.g. thyme, rosemary, etc. Season with salt and pepper and then cook the sauce for several hours on low. At this point, you can add a scoop of the bagna cauda for a nice little salty hint of garlic and anchovy, but the sauce is perfectly fine without it. If you like garlic, but not the anchovies, add some chopped garlic along with the onions in the first step. Puree the tomato sauce in the slow cooker with an immersion blender before proceeding with the meatballs.
To make the turkey meatballs, season and sauté one finely-diced small onion in olive oil until golden. Let the onion cool before proceeding. When you’re ready to make the meatballs, mash one slice of bread (I used an organic white sandwich slice) with a little milk or half and half, just enough to moisten the bread and make it into a nicely-mashed puree. Separately, an egg in a small bowl. In a medium bowl, mix 1 lb of ground turkey, the bread, the egg, the sautéed onions, and ¼ cup of chopped wilted spinach (if you’ve made the Eggs Florentine above, you’ll have some left over, otherwise you can wilt a little in a pan, or use any other kind of cooked vegetable or herb – sautéed peppers, carrots, chopped parsley, etc.) Feel free to omit the additional vegetables- the meatballs will be perfect without it, but they add a nice pop of color and flavor. Season the meat mixture with a little salt and pepper, and then mound with an ice cream scooper onto a sheet pan- you’ll have approximately 12-16 meatballs.
Brown the meatballs in olive oil in a large sautee pan until golden all over, and then place into the tomato sauce and continue to cook on low for another hour or two. The meatballs will be mostly cooked through from the searing on the stove, and they won’t overcook if you need to keep them in the slow cooker for up to a few hours.
When you’re ready to serve, cook your pasta until al dente in salted water, drain, and return to the pasta pot. Pour the contents of the slow cooker into your pasta, and give it all a good toss. Plate and serve with some grated Parm.
So that’s it for this week. I’m happy to report that for once it wasn’t 3,000 words. It was 3,600.
But hopefully this has all been useful to you. It’s been an adventure for me – not because it was our first year with a CSA – but because I’ve been able to share what we cook on a weekly basis with a wider audience. Some of the dishes ended up being featured on sites that I admire, such as FoodGawker, Food 52, Bon Appetit, and Hatchery.co. But mostly, the recipes ended up living quietly on this site, appreciated by the few who took the time to cook them at home, and report back. I loved reading your comments and knowing that our home-cooked meals inspired other families to cook up a storm, many of whom were working their way through CSA deliveries of their own.
Most important, I wanted to send a huge thank you to Bialas Farms. Kasha, if you’re reading this, it was real. I’m already looking forward to June.
Next week, it’s back to the basics. I haven’t even planned my post, I may need ideas! Wish me luck 🙂


Thanks for the great post Jess. Having been lucky enough to eat your tagliatelle with turkey meatballs, I can attest to the fact that it is a truly heavenly meal.
Glad you liked it, miss you! xox
Best CSA season ever! Loved all of your wonderful recipes and awesome ideas! Enjoy a little more time for you now!
Jessica, I thank YOU as well! You have done some amazing things with the shares I’ve packed each week. I’m truly impressed.
It was nice having a few minutes to chat about food, blogs and photography a few weeks back. It was nice taking a breather, honestly! Thanks for being there to share it 🙂
I can only imagine what your freezer must look like with all that you were able to put away this year. I wish you all very full tummies over the winter and by June, you’ll be racing up here to pick some FRESH VEGGIES!
Great job, Jessica!
wow…. so glad I “liked” your FB page…. can’t wait to try some of your recipes.